Introduction
Geospatial projects often require performing the same operations repeatedly—such as generating buffers for multiple administrative units, processing numerous raster datasets, or applying identical spatial transformations. These repetitive tasks can be time-consuming when done manually. Model Builder in ArcGIS Pro provides an effective solution by enabling users to automate workflows through a visual, drag-and-drop environment.
In this article, we demonstrate two automated workflows developed in ArcGIS Pro using Model Builder:
- Automated buffer generation for eight administrative blocks
- Slope analysis derived from Digital Elevation Model (DEM) raster data
Both workflows were designed to improve efficiency, ensure consistency, and minimize manual errors, resulting in faster and more reliable geospatial analysis.
1. Automated Buffer Zone Generation for Eight Administrative Blocks
Buffer analysis plays a critical role in defining zones of influence around spatial features such as administrative boundaries, transportation networks, and water bodies. Creating buffers individually for each administrative block can be inefficient and prone to inconsistency. By leveraging Model Builder, this process can be fully automated, allowing batch processing and iterative execution across multiple features.
This automated approach ensures uniform buffer distances, reduces processing time, and enhances overall workflow reliability—especially when working with large or complex datasets.
Step-by-Step Workflow: Automating Buffer Creation in ArcGIS Pro
Step 1 – Project Initialization: Begin by launching ArcGIS Pro and creating a new Map Project. Save the project in your designated workspace to ensure all outputs remain organized and easily accessible.
Step 2 – Load Block Boundary Data: Navigate to Map → Add Data and import the block boundary shapefile into the project.
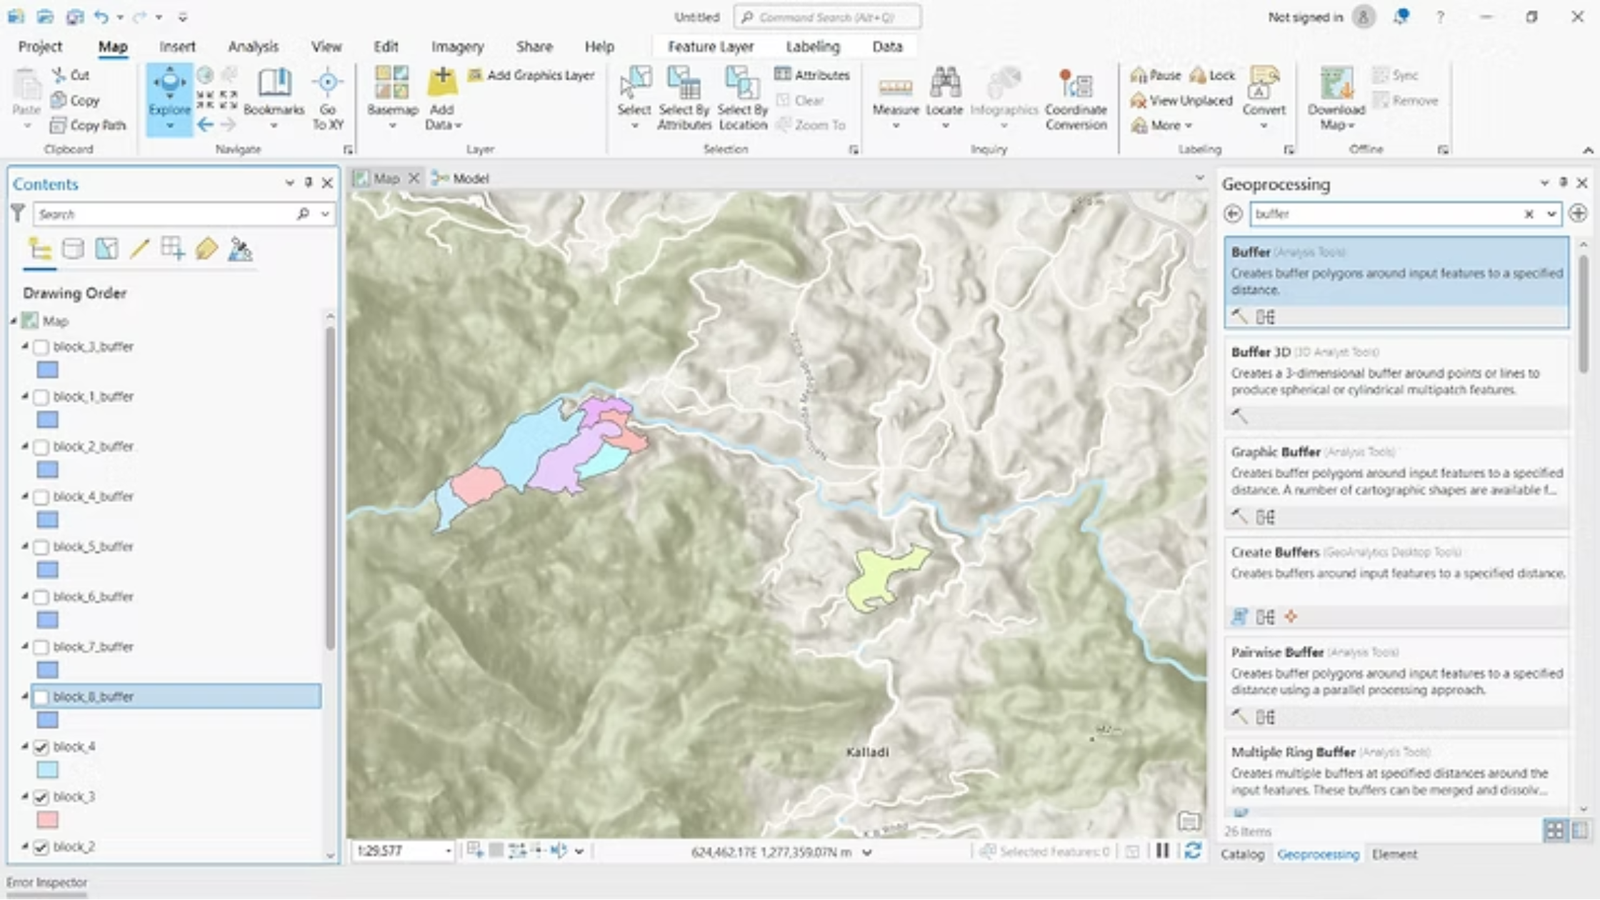
Step 3 – Launch Model Builder: Open Model Builder by selecting Analysis → Model Builder, which provides a visual interface for creating automated geoprocessing workflows.
Step 4 – Configure Feature Iteration: Insert the Iterate Feature Selection tool into the model. Connect it to the block boundary layer and define the selection parameters to process each block individually.
Step 5 – Add and Configure the Buffer Tool: Add the Buffer tool to the model and connect it to the iterator output. Specify the desired buffer distance (for example, 500 meters or 1 kilometer) and set the appropriate dissolve options based on analysis requirements.
Step 6 – Automate Output Naming: To generate unique and meaningful output names automatically, apply inline variable substitution such as %Name%_Buffer, ensuring each buffer output is clearly identified.
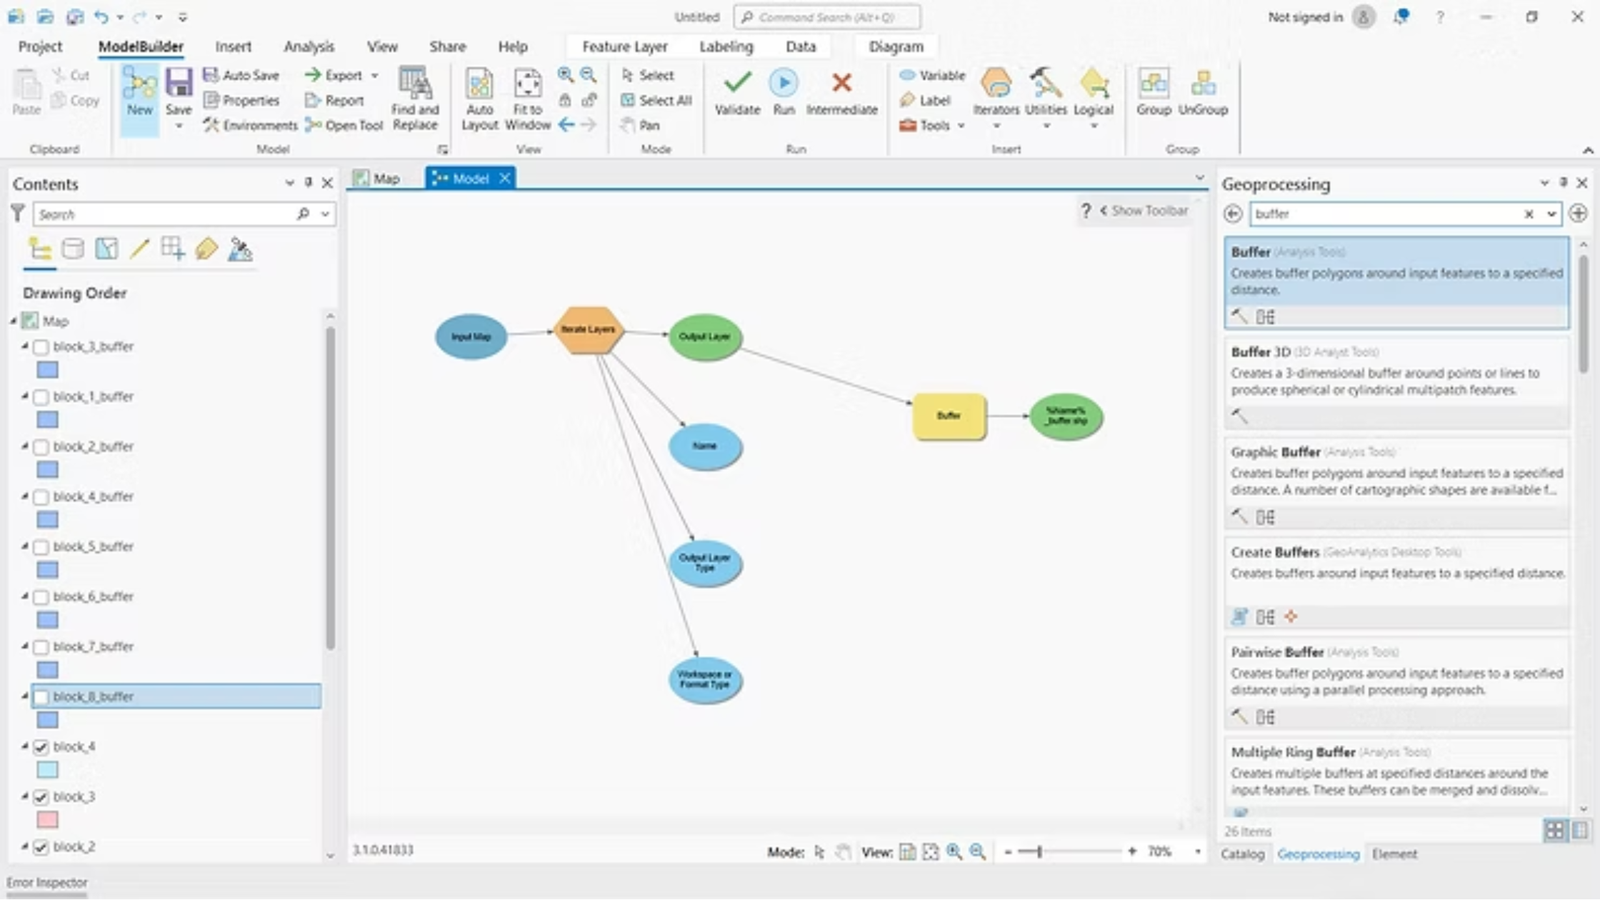
Step 7 – Validate and Execute the Model: Validate the model to check for errors, then run it to automatically generate buffer zones for all blocks.
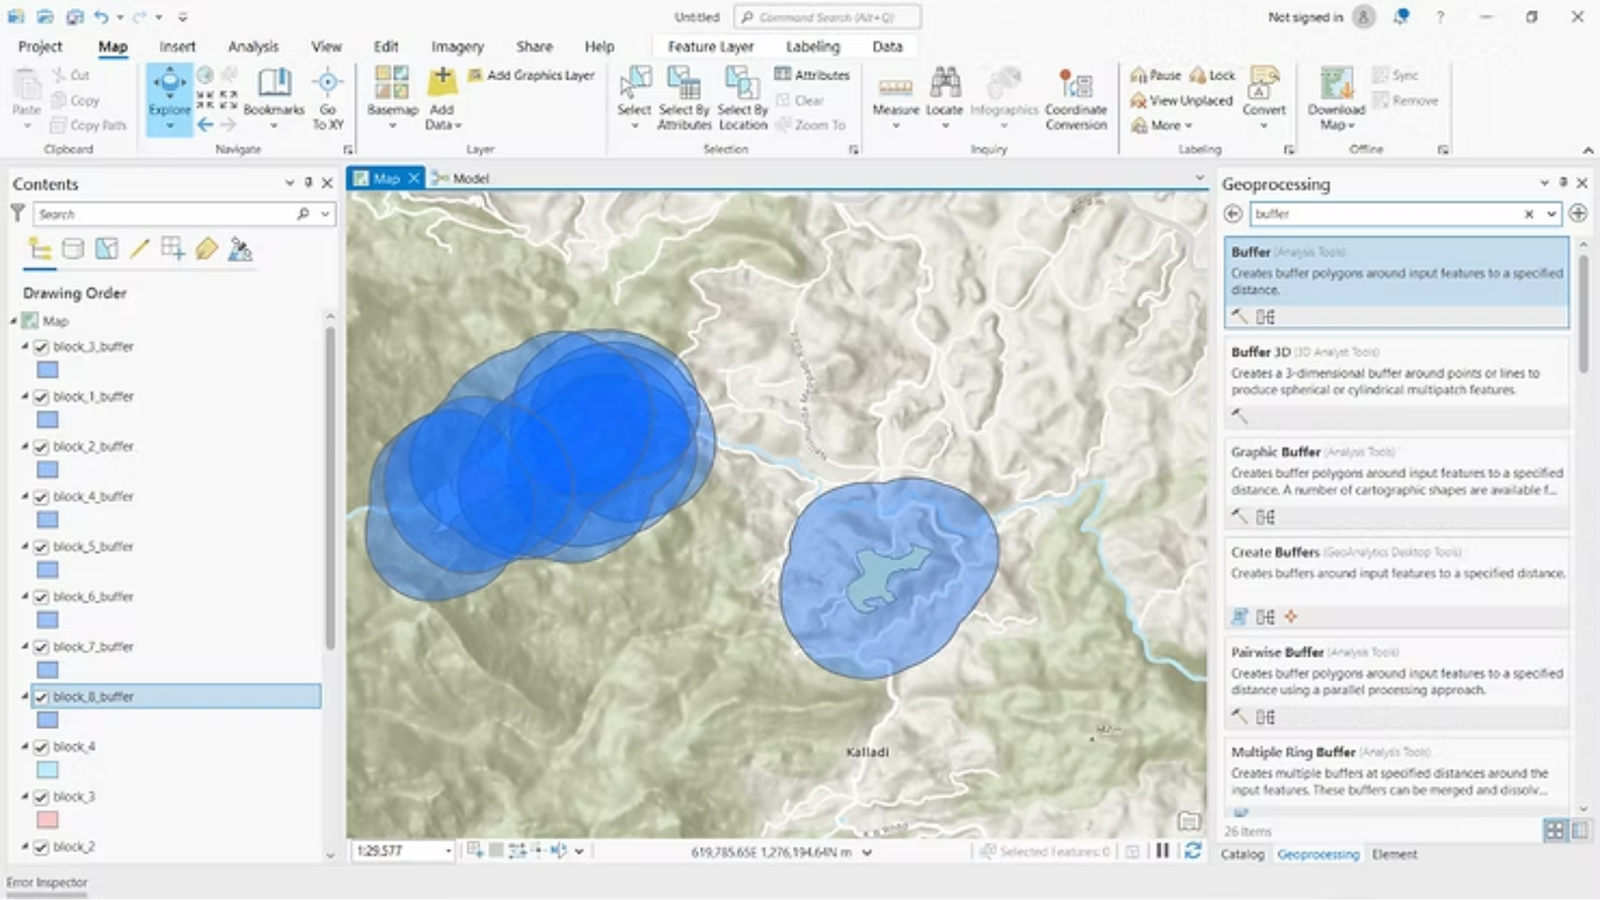
Outcome
This automated workflow successfully generated uniform buffer zones for all administrative blocks without manual repetition, significantly improving efficiency and consistency in the analysis.
Automated Slope Analysis Using DEM Raster Data
Automated Slope Analysis Using DEM Raster Data
Step-by-Step Workflow
Step 1 – Project Setup: Start by opening an existing ArcGIS Pro project or creating a new one to prepare the workspace for terrain analysis.
Step 2 – Import DEM Raster Data: Add the Digital Elevation Model (DEM) raster file (in .tif format) to the project for slope computation.

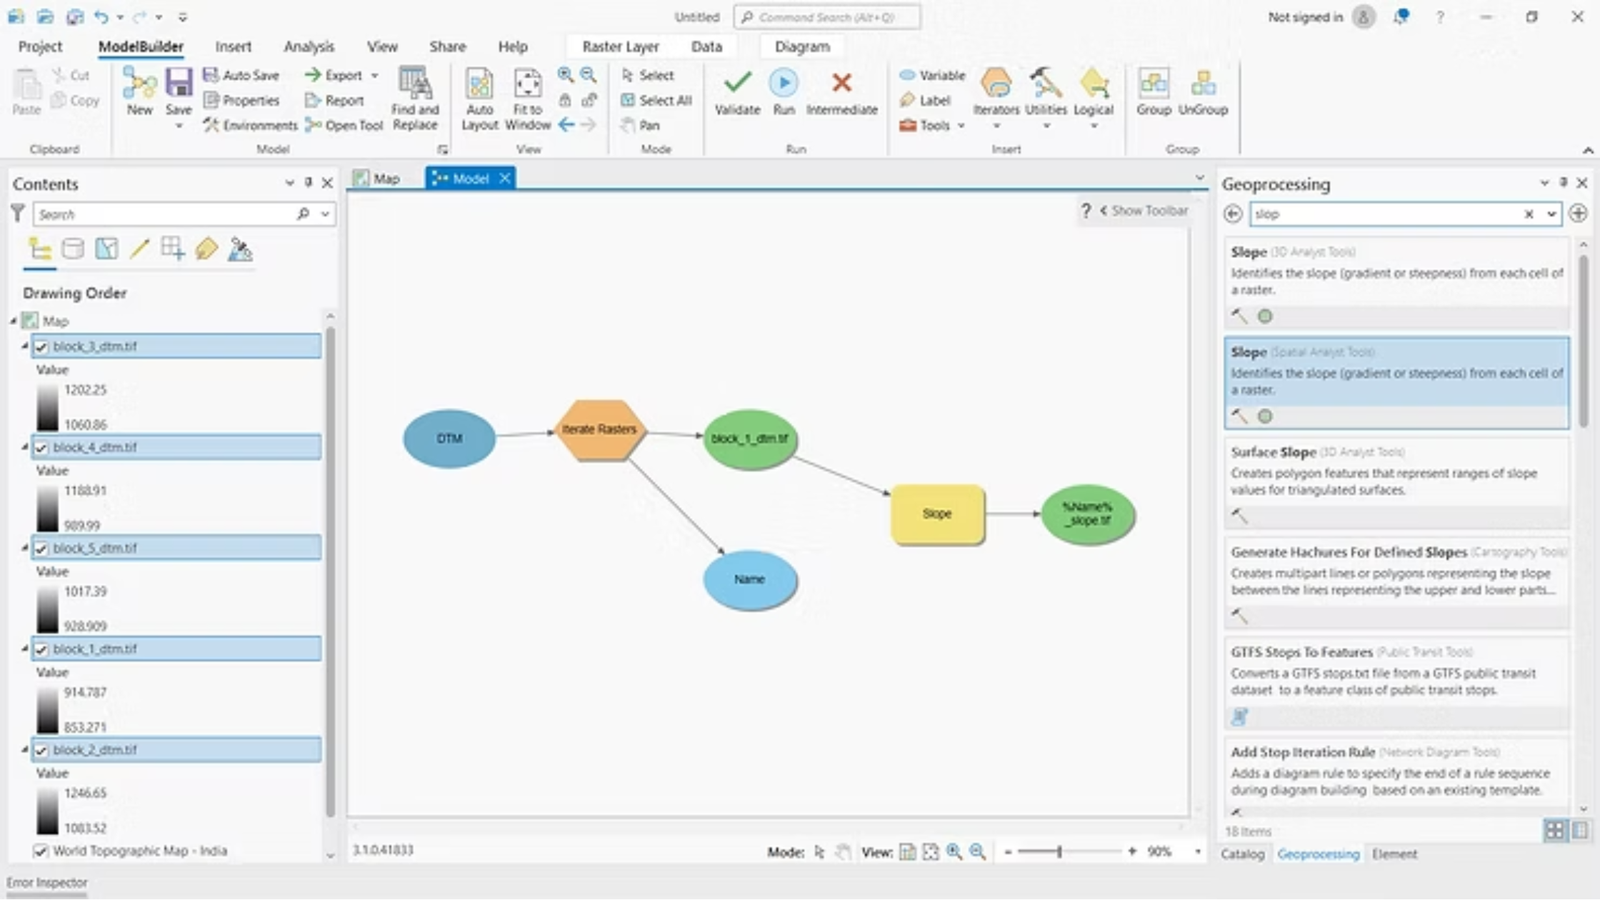
Step 3 – Launch Model Builder: Navigate to Analysis → Model Builder to open the visual workflow environment.
Step 4 – Add DEM to the Model: Drag the DEM raster layer directly into the Model Builder canvas to use it as an input dataset.
Step 5 – Configure Raster Iteration (Optional): If multiple DEM files are being processed, insert the Iterate Rasters tool. Specify the workspace and apply a filter to include only TIFF files.
Step 6 – Add the Slope Tool: Insert the Slope geoprocessing tool and connect it to the DEM input or raster iterator.
Step 7 – Set Slope Parameters: Define the output measurement type—Degrees or Percent Rise—based on analysis needs. Set the Z-factor to 1 when elevation units are in meters.
Step 8 – Automate Output Naming: Apply inline variable substitution such as %Name%_Slope to automatically generate clear and consistent output names.
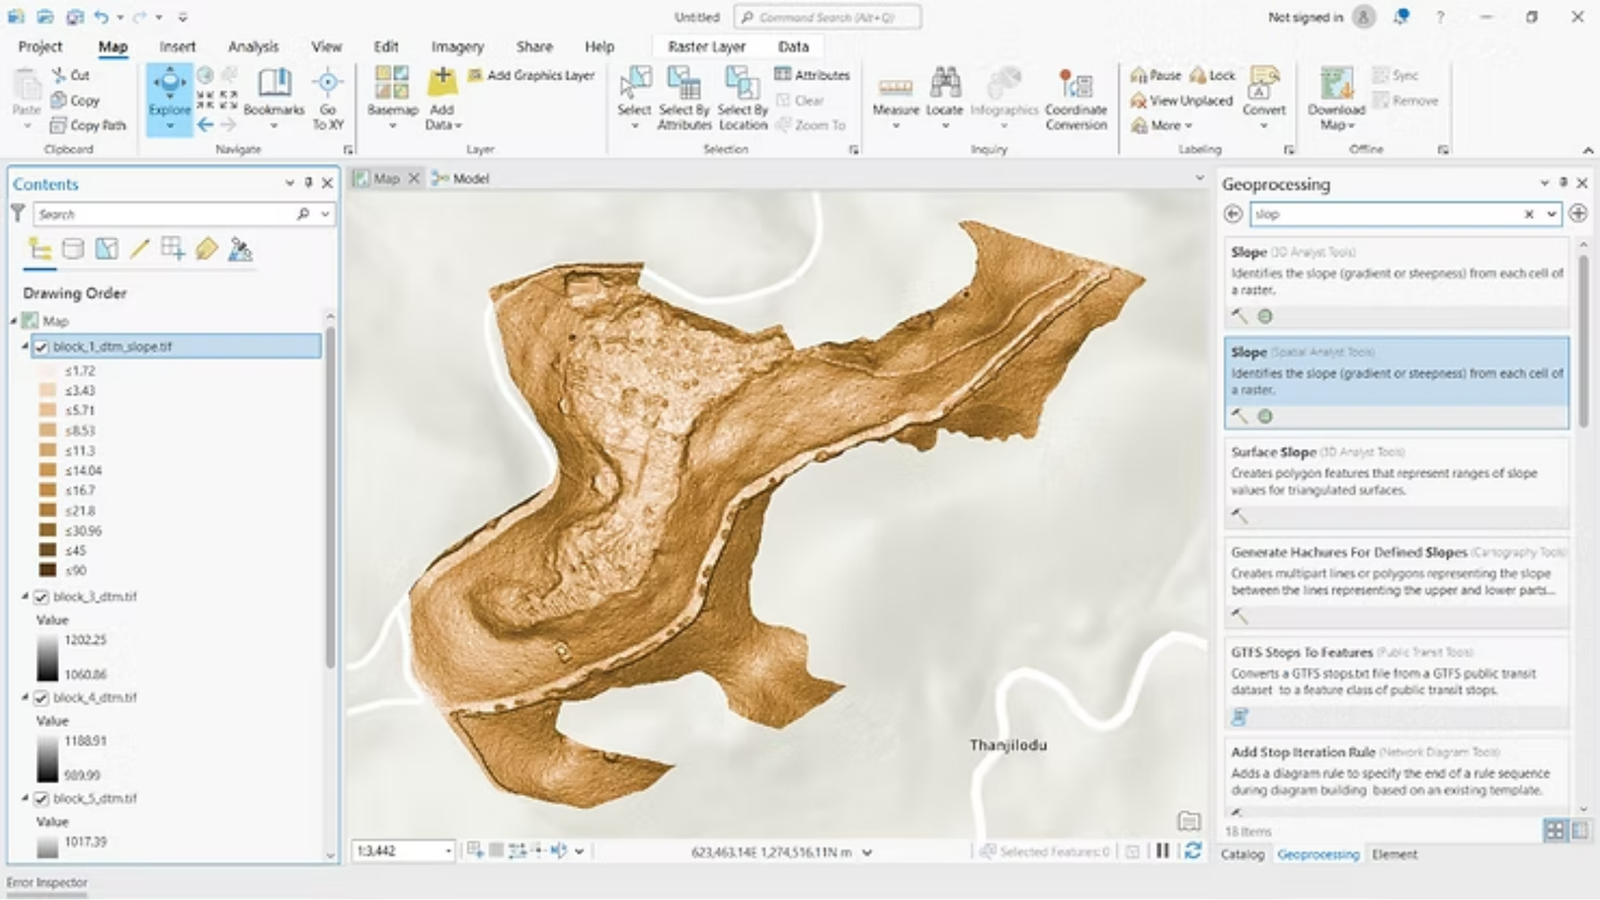
Outcome
The automated model efficiently generated slope raster outputs while maintaining consistency across multiple terrain datasets.
Conclusion
Model Builder in ArcGIS Pro converts repetitive GIS operations into streamlined, automated workflows. From administrative boundary processing to terrain analysis, automation improves efficiency, accuracy, and repeatability—making it an essential tool for modern geospatial analysis.