Complexity: Beginner
Data Requirement: ArcGIS Tutorial Data for Desktop
Data Path: c:\ArcGIS\ArcTutor\Geocoding
Goal: To create an address locator
Legacy
Store locators in a file folder to use new features not supported in geodatabases, like performance boosts, multithreading, and suggestions. ArcGIS 10.4 is the last version to support storing locators in geodatabases.
In this tutorial, you’ll learn how to create a new address locator. An address locator helps convert written locations into map features. They are stored in a folder you choose. The first step is creating an address locator using your copy of the Atlanta file geodatabase.
Get the Data
The data for this tutorial is available for download on arcgis.com.
- Go to the item description web page of the geocoding tutorial data on arcgis.com.
- Click Open > Download, and save the file locally.
- Unzip the downloaded file.
- It’s recommended to save the downloaded Geocoding folder to: C:\ArcTutor\Geocoding. This location will be used throughout the tutorials, so save it here to make instructions clearer.
Create an Address Locator
To create an address locator, follow these steps:
- Start ArcCatalog.
- Browse to the Geocoding folder of the tutorial data that contains the Atlanta file geodatabase.
- Right-click in the empty space of the Contents tab inside the Geocoding folder containing the Atlanta geodatabase, and click New > Address Locator.

The Create Address Locator dialog box appears.
- Click the browse button next to the Address Locator Style text box to open the Select Address Locator Style dialog box.

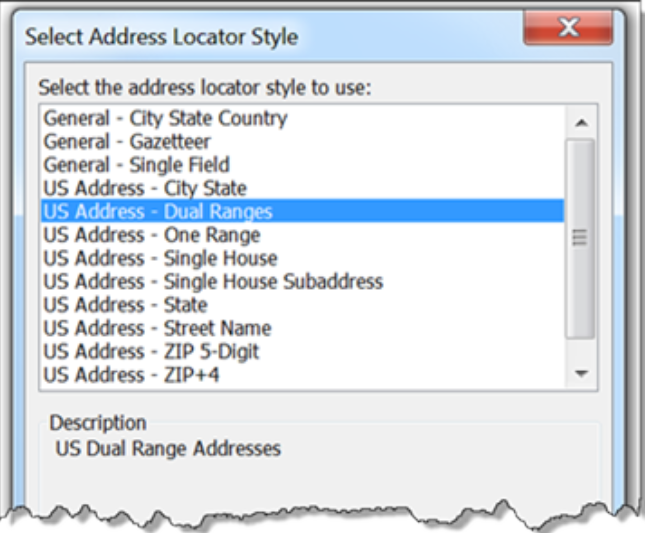
Choose the US Address – Dual Ranges address style and click OK.
- Click the browse button next to the Reference Data text box.
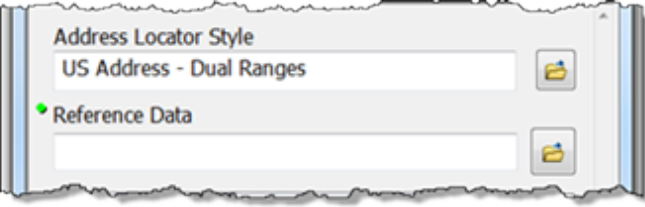
The Reference Data dialog box appears.
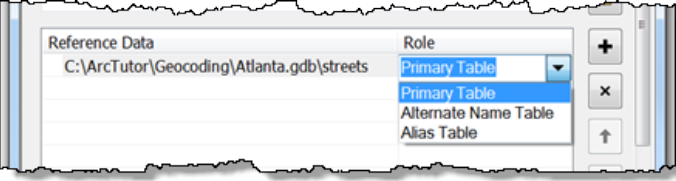
- Browse to the Atlanta file geodatabase, choose the streets feature class, and click Add.
You can also drag and drop the streets feature class from the workspace to the Reference Data text box in the dialog box.
- On the Create Address Locator dialog box, click the arrow under the Role column heading and click Primary Table.
- The Field Map section should be completed automatically. If not, choose the appropriate field in the reference data for each address locator field.
Fields with an asterisk (*) next to their names are required by the address locator style. These fields must be mapped with valid fields in the reference data. Nonrequired fields can be left as <None> if they don’t apply.
Next, set the output path for the locator.
- Click the browse button next to the Output Address Locator text box.
The Output Address Locator dialog box appears. - Browse to the Geocoding folder that contains the Atlanta geodatabase, type Atlanta in the Name text box, and click Save. The output path is displayed on the Create Address Locator dialog box.

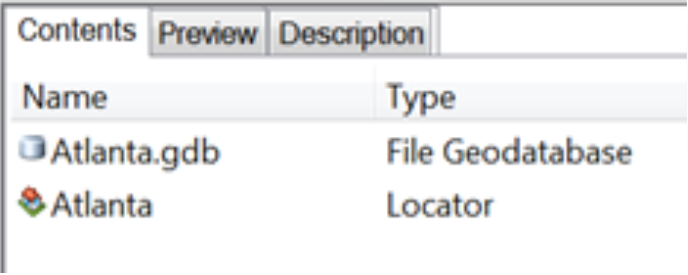
- Click OK to begin creating the address locator. When the process finishes, the new address locator appears in the Geocoding file folder alongside the Atlanta geodatabase.